
I did note that the other switches were 3 position instead of the 5 position I was using, so this was a bonus--I planned to use the 3 position switch head from the new switch with the circuit modules from the switch I had at home. I proceeded to the check out pile...and there he was. It was like he was lying in wait for me. "Big Elf" wasted no time in snarking to me "I guess the price wasn't so bad after all." Resisting the urge to purge, I simply replied that I needed this one to make the other one work. We completed our transaction and I was off.
I had decided to fill some of the holes in the motor starter box that I was re-purposing for the switch. I had picked up a can of Bondo earlier in the week. Never having worked with the stuff personally, I decided to start there so that I could get the box repaired and repainted with some dry time while I was building the switch. The smell of Bondo was instantly familiar, though I'm not sure why--Dad was not a big fan of the stuff. Remembering that I had hated that smell, it was strangely comforting now--something akin to "your own shit don't stink". It took a few tries for me to get the holes filled to my satisfaction. Finally deciding that I was taking too much time with this, I put a coat of paint on and set it aside to dry while I worked on the switch.
 Once I got the switch apart, I realized that the cams in the two switches were not the same and I would not be able to simply take a cam from the new and add it to the old to get the "dead" position I needed. Moreover, the 3 position head and the 5 position head worked in tandem with their respective cam designs, so it at first looked like I was not going to be able to get a working combination. Ultimately, I found that the head and 2 cams from the new switch installed on the circuits of the old switch gave me everything I needed except...one cam. So I was back where I started except that I now had a 3 position switch head and would not have to manually bi-pass 2 "dead" positions. Looking at the cams I had leftover, I realized that I had 2 cams with only 1 detente and I needed 1 cam with 2 detentes. So I had 2 tries to make the cam I needed.
 This would, of course, be a perfect job for the Mill. I felt that temporarily wiring up the VFD and the Mill to do this job was a bit excessive (you have to draw the line somewhere), so I resorted to caveman technology, sort of. I fitted the cam I needed to copy to the cam I was cutting together as they normally mate and chucked the unit into my vise. These are nylon cams, so cutting the material could be achieved in a variety of ways. I chose a copping saw. I was able to rest the blade against the pattern cam and follow its profile as I cut the new cam. It worked reasonably well, leaving only a little fine tuning to be done with the Dremel tool (actually a China Depot knock-off of a Dremel tool--when will I learn) with an engraving bit. My first attempt worked, so I have a spare if I need it.
I got the switch all together and it worked well, so I was ready to assemble the box. Looking at the now dry box, I decided that it needed another coat of paint. Naturally, this resulted in a mess. For some reason, the fresh paint crackled slightly. I had been very careful to keep contaminates away from the box as it dried and even wiped it with mineral spirits before I painted...oops. I guess the mineral spirits prevented adhesion. So I had to wait for it to dry, sand it down again, and start over. Meanwhile, I went ahead and pulled wire in the conduit I had run last weekend. And this meant that I would soon discover that I had not bought enough wire, so a trip to Lowes. By the time I got back, the paint was dry, so I sanded it again and repainted it again. The finish was not what I had hoped for, but it was good enough. I pulled the wire and then while I waited for the paint to dry, started rearranging tools from the old tool chest to the new tool chest that I bought at the garage sale from the old retired machinist from whom I also bought some tooling --did I mention that? Anyway, I will end up with a tool chest for machining and a tool chest for my general tools.
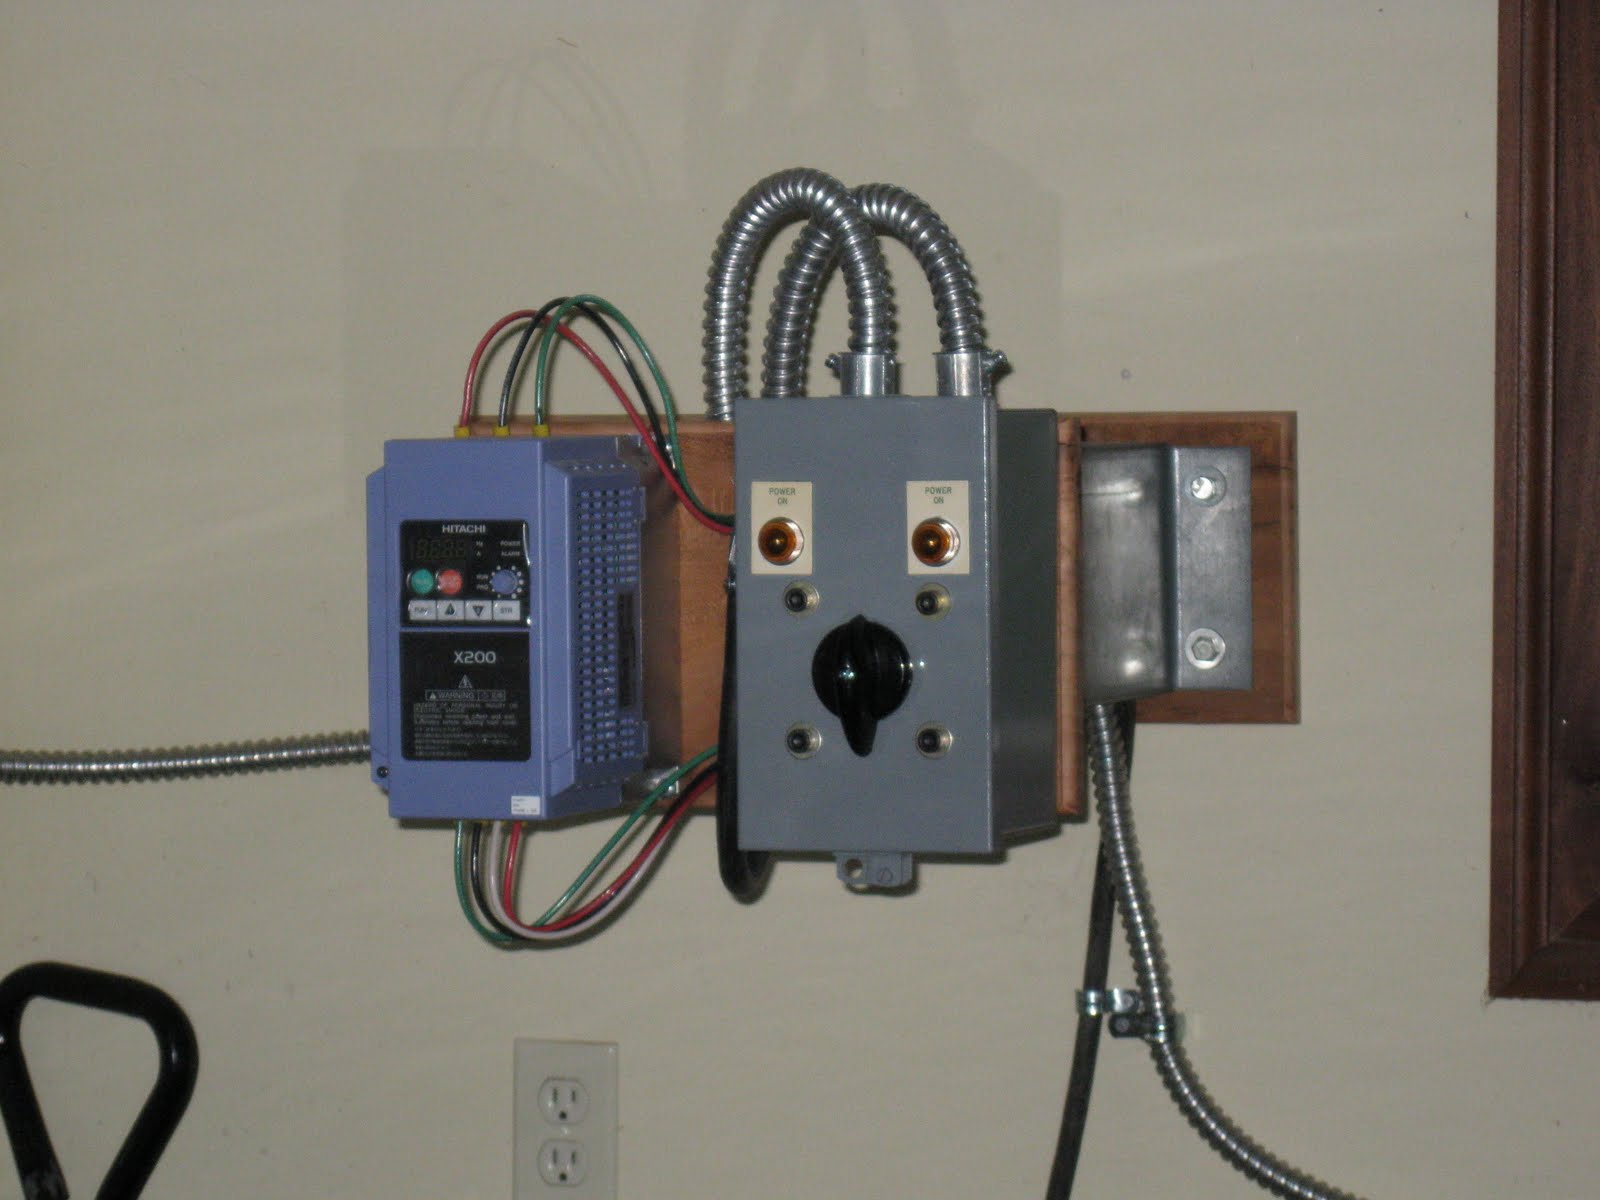 When the paint was dry a third (or fourth, I lost track) time, I assembled the switch and the pilot lights and wired it up. It went together pretty easily (that may not be accurate since this is day 5 on this thing). I did have to change a dedicated ground to a common in order to make the pilot lights work appropriately, so I am using a shared ground for the Mill, Lathe, and Compressor. Not sure if this is Code Kosher, but it works for now (I'll read up on that later). The switch worked fantastically and the Mill is back in business. The Lathe, on the other hand, did not work. I'm certain that the circuit from the switch is correct, since the Mill works. The wiring on the Lathe is highly suspect and the motor might be bad. If I have to buy another motor, I could just buy single phase and this whole switch thing will have been for naught. I didn't have time to figure out the problem, so that will be next week's adventure.


